How to collect rainwater at home is a more practical question than most people expect. It doesn’t require a large property, expensive equipment, or any particular climate — just a roof, a gutter, and a container to catch what falls. People have been doing it for centuries. The modern version is cleaner, cheaper, and easier to set up than most guides make it sound.
Whether you’re building toward energy independence, looking to reduce your water bill, or simply want a reliable backup supply that doesn’t depend on the municipal grid, rainwater collection is one of the most accessible first steps in off-grid preparedness.
How to Collect Rainwater at Home: Check Your State’s Laws First
Before buying a single barrel, check what’s legal where you live. Rainwater harvesting laws vary significantly by state. Some actively encourage it with rebates and subsidies, others have restrictions on how much you can collect or how it can be used, and a small number have historically prohibited it entirely (though those laws are changing).
Ask anyone who assumed rain collection was illegal everywhere. Plenty are surprised to find their own state not only allows it, but sometimes pays a rebate for doing it.
Most states today either permit it outright or have minimal restrictions. States like Texas, Colorado (which recently loosened longstanding restrictions), and Oregon have specific rules worth reading. A quick search for “[your state] rainwater harvesting laws” will get you to the relevant code. Your local water utility or county extension office is also a reliable place to ask: they’re used to the question.
The legal landscape has been shifting toward permitting in most states over the last decade. But confirm before you build, not after. Regulations vary not just by state but sometimes by county.
How a Basic Rainwater Collection System Works
The concept behind how to collect rainwater at home is straightforward: rain falls on your roof, runs into your gutters, travels down the downspout, and instead of draining into the ground or a storm drain, it goes into a storage container. The system has four main components:
- A collection surface — almost always your roof. Larger roof area means more water collected per inch of rainfall.
- Gutters and downspouts — what you likely already have. They direct water toward the storage point.
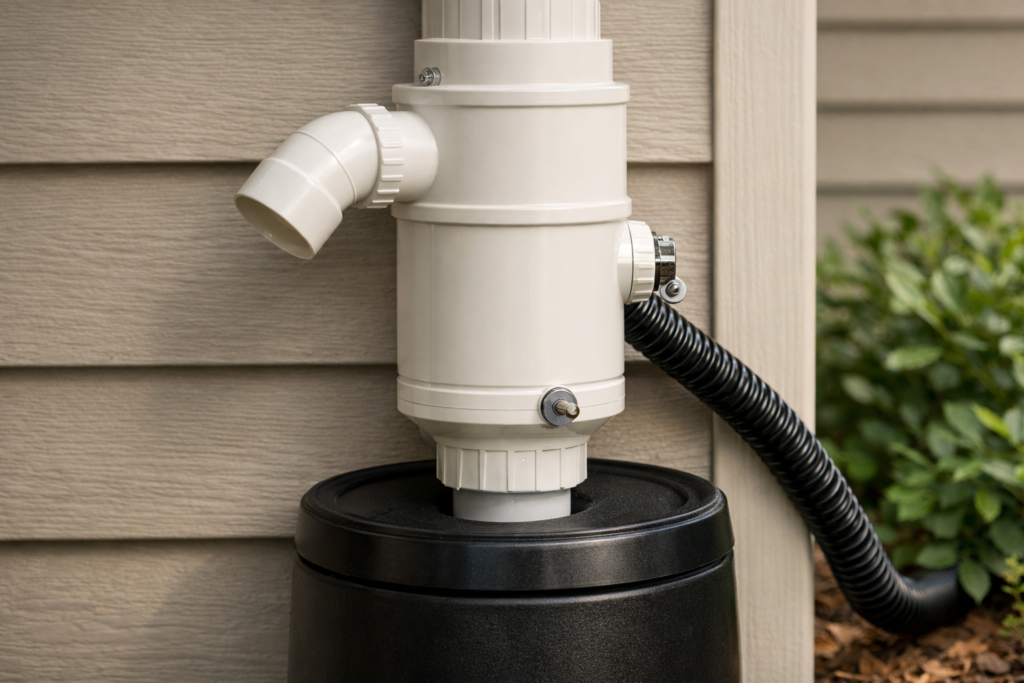
- A first-flush diverter — a device that routes the first flow of water from each rain event away from your storage tank. That first flush carries the most debris, bird droppings, and contaminants from the roof. Diverting it improves water quality significantly.
- A storage container — anything from a 55-gallon rain barrel to a 1,500-gallon cistern, depending on your goals and space.
That’s it at the basic level. You can add filtration, overflow management, and distribution systems as the setup grows, but none of that is required to start.
How Much Water Can You Actually Collect?
More than most people expect. The standard formula: multiply your roof’s square footage by the rainfall in inches, then multiply by 0.623. That gives you gallons collected per rain event (assuming about 80% collection efficiency after losses to evaporation and splash).
An example: a 1,500 square foot roof in an area that gets one inch of rain collects roughly 935 gallons from a single event. Even a modest 500 square foot section of roof yields over 300 gallons per inch of rain. Depending on where you live, one decent storm can fill multiple barrels.
Annual rainfall totals tell you how much you can expect to collect over a year. Even in drier climates, the total is often surprising, and in wetter regions, storage capacity becomes the limiting factor, not supply.
Storage: Rain Barrels vs. Larger Cisterns
The right storage depends on what you’re using the water for and how much space you have.
Rain barrels (50–100 gallons): The standard starting point. Purpose-built barrels are available at most home improvement stores and from many municipalities at subsidized prices. Easy to install, easy to move, and no permits required in most jurisdictions. The limitation is capacity: a single barrel fills up fast in a decent rain and won’t last long if you’re relying on it for irrigation.
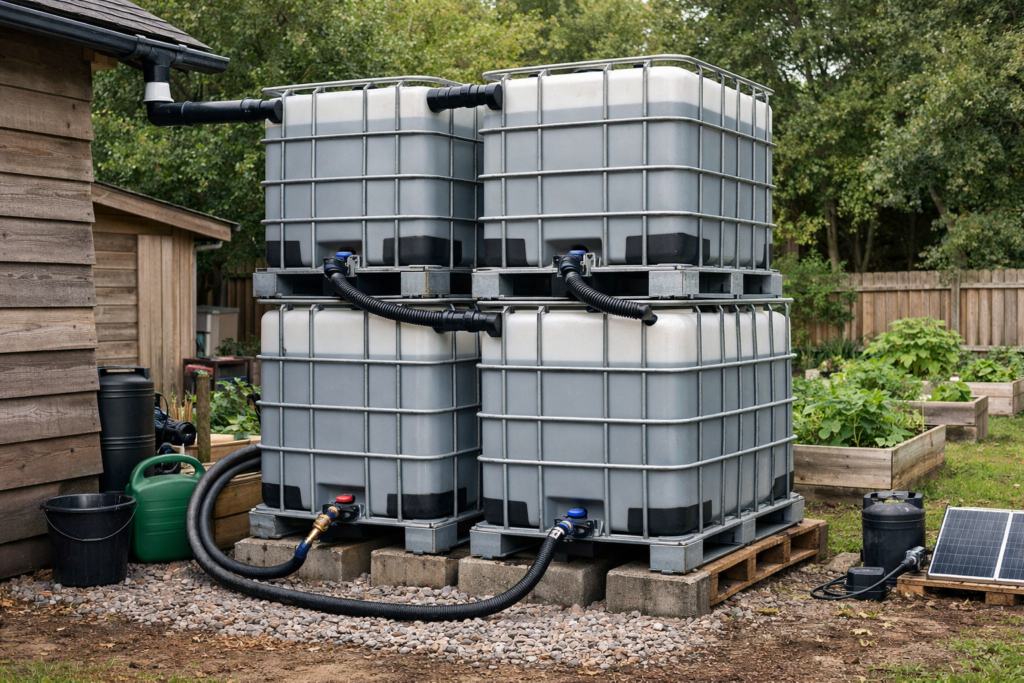
IBC totes (275–330 gallons): Intermediate Bulk Containers (the large plastic cubes in metal cages) are widely available secondhand for $50–$150. They hold significantly more than barrels and can be connected in series to expand capacity. Ensure any used tote previously held food-grade contents, not chemicals.
Cisterns (500–3,000+ gallons): For serious collection, above-ground or underground cisterns offer substantial storage. These require more planning, potentially permits, and a larger upfront investment, but they can supply a meaningful portion of a household’s non-drinking water needs year-round.
Water Quality and What You Can Use It For
Collected rainwater is not drinking water straight from the barrel. Without treatment, it’s best used for irrigation, outdoor washing, toilet flushing, and laundry (where local codes allow). For most households starting out, these uses alone justify the setup: outdoor watering is typically one of the largest components of residential water use. It’s also worth keeping in mind how much water to store per person for drinking, since rainwater collection and a proper drinking water reserve solve two different problems.
If drinking water is the goal, the system needs additional steps: a first-flush diverter, sediment filtration, and either UV treatment or a quality carbon filter certified for potable use. The roof material matters too: asphalt shingles introduce some contaminants that require treatment to remove. Metal and tile roofs are cleaner collection surfaces.
For garden irrigation and outdoor use, a basic barrel with a screen over the inlet is enough. For drinking, treat the water and have it tested before you rely on it. Those are two different systems with different standards.
A Practical Starting Point
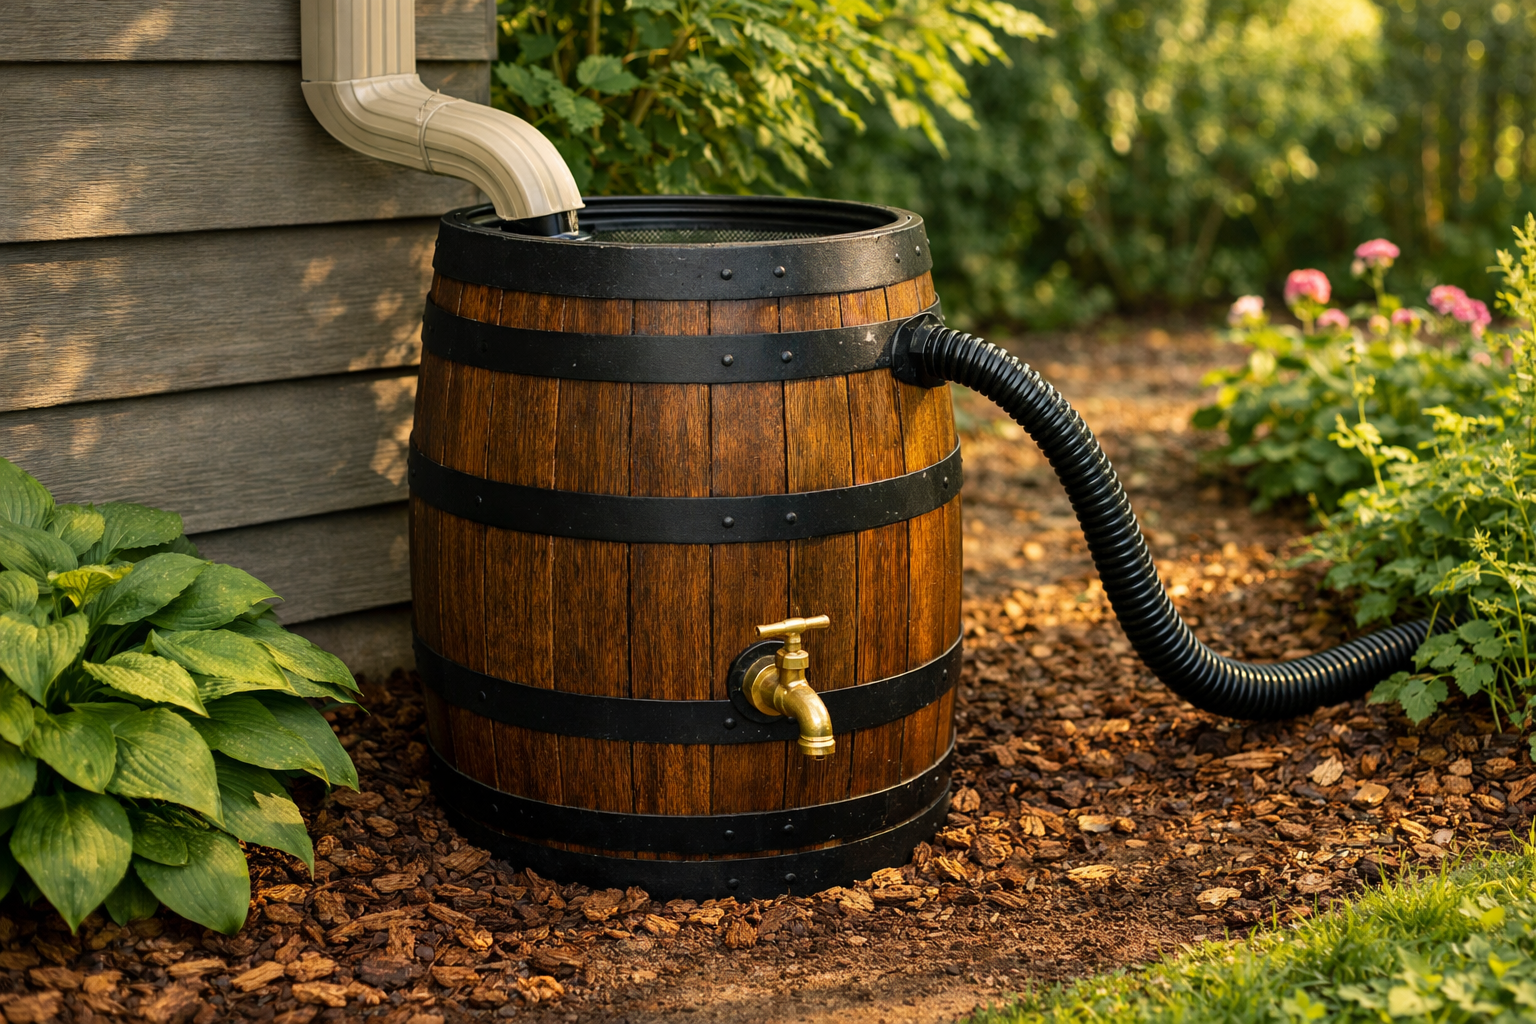
The simplest way to start is a single rain barrel connected to one downspout. Most setups involve cutting the downspout at the right height, attaching a diverter that routes overflow back to the original drain path when the barrel is full, and fitting a screen over the barrel opening to keep out debris and mosquitoes.
A spigot near the bottom of the barrel lets you connect a garden hose or fill watering cans. Position the barrel on a raised platform (cinder blocks work fine) so the spigot clears the ground and gravity does the work.
Total setup time for a basic single-barrel system: two to three hours. Total cost: $30–$100 depending on whether you buy a purpose-built barrel or repurpose a food-grade container. From there, expanding is a matter of adding more barrels, linking them with overflow hoses, and eventually upgrading storage as your needs grow.
Learning how to collect rainwater at home doesn’t require going all-in from the start. One barrel, one downspout, one afternoon. That’s a working system, and a foundation you can build on. It pairs naturally with other small off-grid wins, like learning how to reduce your electric bill significantly, since both start with one simple change rather than a full system overhaul.
Q: Is it legal to collect rainwater at home?
In most U.S. states, yes — and the trend has been toward expanding that permission over time. Some states have restrictions on volume or permitted uses, and a few historically prohibited it, though most have since changed those rules. Check your state’s specific regulations and your local county code before installing a system.
Q: How much rainwater can you collect from your roof?
Use this formula: roof area (sq ft) × rainfall (inches) × 0.623 = gallons collected. A 1,000 square foot roof section collects roughly 600 gallons per inch of rainfall, accounting for typical losses. Annual totals depend on your regional rainfall — in many areas, storage capacity becomes the limiting factor before supply does.
Q: Can you drink collected rainwater?
Not directly from a basic rain barrel system. For irrigation, outdoor washing, and toilet flushing, a standard first-flush diverter and screen are sufficient. For drinking, you need sediment filtration, UV or activated carbon treatment rated for potable use, and ideally water testing. The roof material and surrounding environment also affect water quality.