Most people who know how to build a home first aid kit have the same problem: they built one once, never touched it, and have no idea what’s in it anymore. The bandages are stale, the antiseptic dried out two years ago, and the thermometer needs a battery. It looks ready. It isn’t.
A first aid kit is only useful if it’s stocked, organized, and familiar. Here’s how to build one that actually holds up — and stays that way.
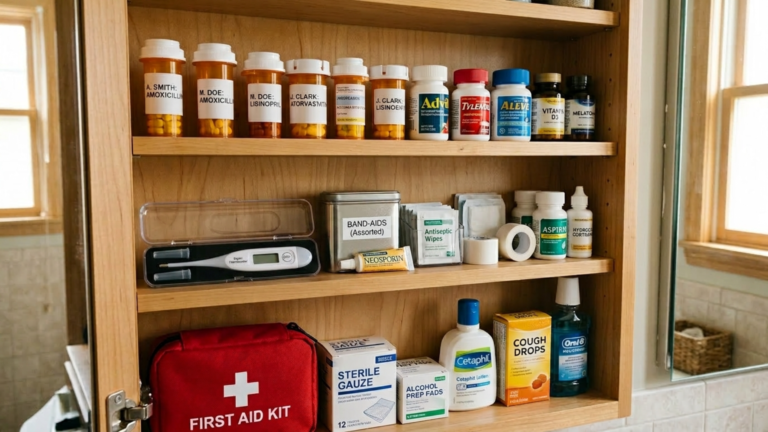
Start With the Container
Before anything goes in, the container matters. It needs to be easy to grab in a hurry, able to close securely so things don’t spill, and waterproof or at least water-resistant in case of a flood or outdoor use.
Hard-shell cases with latches work better than soft pouches: contents stay organized and protected. A bright color or clear labeling helps in low-light conditions. Purpose-built first aid cases are inexpensive and worth the few extra dollars over a repurposed shoebox that will eventually collapse at the wrong moment.
Keep it in a consistent, accessible location that every adult in the household knows. A kit stored in an obscure cabinet loses half its value immediately.
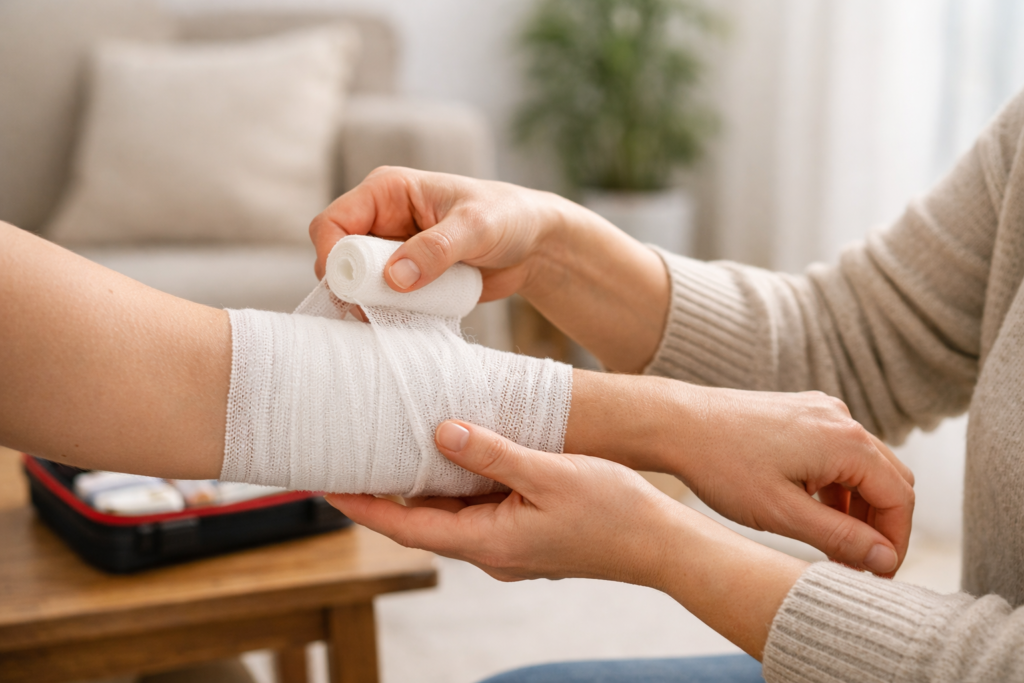
How to Build a Home First Aid Kit: The Core Supplies
Knowing how to build a home first aid kit starts with these three categories: wound care, medications, and tools. Here’s what belongs in each:
Wound care:
- Adhesive bandages in multiple sizes — the variety packs earn their space
- Sterile gauze pads (2×2 and 4×4 inches)
- Medical tape
- Elastic bandage wrap (Ace bandage) for sprains
- Antiseptic wipes or isopropyl alcohol (70%)
- Antibiotic ointment (Neosporin or generic equivalent)
- Sterile saline solution for wound flushing
- Butterfly closures or adhesive wound closures for deeper cuts
Medications:
- Pain reliever / fever reducer — ibuprofen and acetaminophen (they work differently; having both is useful)
- Antihistamine — for allergic reactions and insect bites
- Anti-diarrheal medication
- Antacid
- Any prescription medications your household depends on — keep a small backup supply if your doctor allows
These medication basics cover acute injuries; for the fuller household picture (including backup prescriptions and less obvious essentials), see what medications to have on hand more broadly.
Tools:
- Thermometer — digital, with fresh batteries
- Tweezers — for splinters, debris, tick removal
- Scissors — medical shears that can cut clothing if needed
- Disposable gloves — nitrile, at least two pairs
- CPR face shield
- Cold pack (instant, squeeze-to-activate)
- Flashlight or headlamp with fresh batteries
If anyone in your household has a severe allergy, an epinephrine auto-injector (EpiPen) belongs in this kit and everyone in the household should know how to use it. This isn’t optional.
What Most Kits Are Missing
Commercial pre-assembled kits are convenient but almost always underpowered in the same ways. The most commonly missing items:
- Wound irrigation syringe — flushing a wound under pressure is far more effective than pouring from a bottle. Inexpensive and takes up almost no space.
- Medical stapler or skin staples — for deep lacerations when stitches aren’t immediately accessible. Intimidating to think about, straightforward to use.
- SAM splint — a flexible, reusable splint that can immobilize a wrist, ankle, or finger fracture. Lightweight and compact.
- Tourniquet — a real one, not a shoelace. The CAT tourniquet is the standard. For serious bleeding, this is life-saving equipment.
- Hemostatic gauze (QuikClot) — accelerates clotting for serious wounds. Standard in military and emergency medicine kits.
You don’t need all of these immediately. Build the core kit first, then add the more advanced items over time as your confidence grows.
Organize It So You Can Use It Under Stress
A disorganized kit is nearly as bad as no kit. When something goes wrong, you don’t want to dig through a jumble of supplies looking for the right bandage while someone is bleeding.
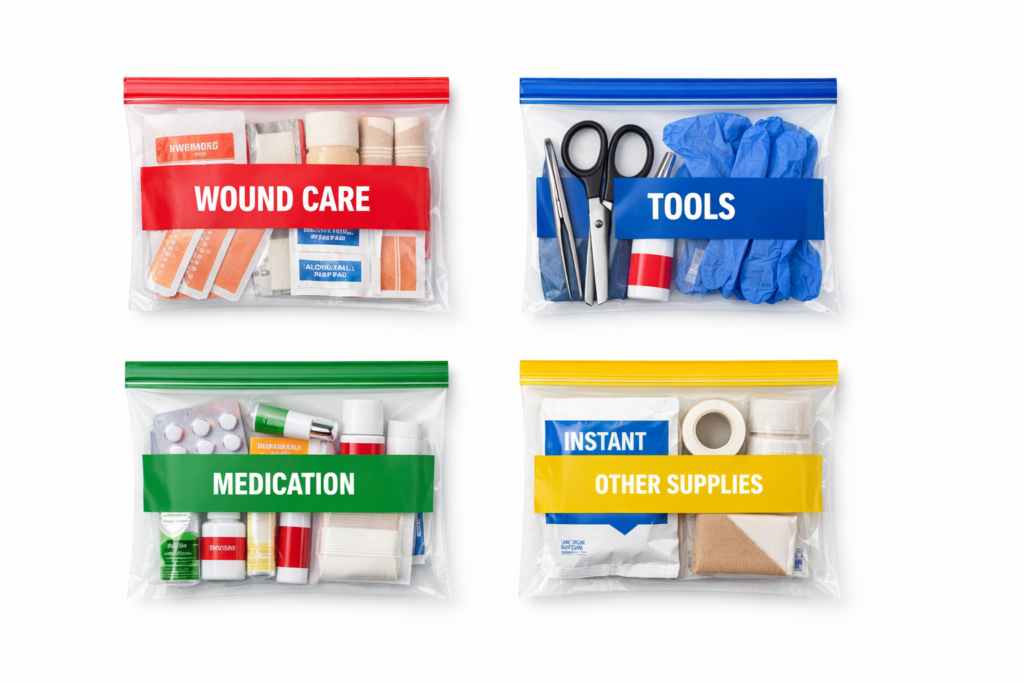
Use clear zip-lock bags or small pouches to group related items together: wound care in one, medications in another, tools in a third. Label each group. Some people use color-coded bags: red for wound care, blue for medications. Whatever system you’ll stick with is the right one.
Put the most frequently needed items (bandages, pain reliever) at the top or in the most accessible section. The specialized tools can go underneath.
Maintain It — This Is Where Most Kits Fail
Supplies expire. Batteries die. Medications lose potency. The best practice is a brief annual check: go through everything, replace what’s expired or depleted, restock what’s been used.
A good trigger: the same day you change your smoke detector batteries each year, do a first aid kit review. It takes 15 minutes and means your kit is never more than 12 months behind.
Customize It for Your Household
The supplies listed above cover the average household. Most households aren’t average. A few additions worth considering based on who’s in your home:
If you have young children, add infant or children’s versions of any medications, since dosing is different, and adult formulations aren’t appropriate substitutes. A bulb syringe, children’s electrolyte solution, and a pediatric dosage chart are worth including. Kids also tend to need more bandage variety, since a standard 1-inch strip on a skinned knee doesn’t always stay put.
If older adults live in the home, think about their specific needs: blood pressure medications, mobility aids, medical alert information. A laminated card listing their current prescriptions, dosages, and any known allergies can save critical time if emergency responders need to step in. Keep it in the kit and update it when anything changes.
If you have pets, a basic pet first aid kit makes sense to build separately — or at minimum, keeping pet-specific supplies in a clearly labeled section of your main kit. Styptic powder for nail cuts, saline for eye irrigation, and an emergency vet contact card are the starting points. Several medications safe for humans are toxic to dogs and cats, which is a good reason to keep the supplies separate and labeled clearly.
There’s no single correct first aid kit. There’s only the one that matches who’s in your household — the people, the risks, and the situations you’re most likely to face.
Know the Basics of What’s in It
Knowing how to build a home first aid kit is one part of the equation. Knowing how to use what’s in it is the other. A basic first aid course (Red Cross offers them regularly, often for free or very low cost) covers wound care, choking response, and CPR in a few hours. It’s worth the afternoon.
A kit stocked by someone who understands how to use it is a different resource than a box of supplies someone assembled and forgot about. The goal isn’t a perfect kit. It’s a kit you’re ready to open.
Q: What should be in a home first aid kit?
A well-stocked home first aid kit covers three areas: wound care (bandages, gauze, antiseptic, medical tape), medications (pain reliever, antihistamine, antacid), and tools (thermometer, tweezers, scissors, gloves). Most commercial kits are missing wound irrigation supplies and advanced wound closure options.
Q: How often should I replace items in my first aid kit?
Do a brief check at least once a year — replace anything that’s expired, depleted, or has dead batteries. A simple habit: review your kit the same day you change your smoke detector batteries each year. That keeps it current without requiring you to remember a separate date.
Q: What first aid kit do most households overlook?
The most commonly missing items are a wound irrigation syringe, a tourniquet, hemostatic gauze, and a SAM splint. Most pre-assembled commercial kits skip these entirely. They’re inexpensive, compact, and make a meaningful difference in serious situations.